//=============================================================================
// kicks.
// This is an example of a Vertexanimation
// The animated Mesh will show up in the UEd Meshes browser,
// if you added kicks to your EditPackages
// and put the file kicks.u into the System folder of UT2003
// Mathias Fuchs, 2/May/2003, model and animation by Kolt Wilson
//=============================================================================
class kicks extends Actor placeable;
#exec
MESH IMPORT MESH=kicks ANIVFILE=MODELS\kicks_a.3d DATAFILE=MODELS\kicks_d.3d
X=0 Y=0 Z=0
#exec MESH ORIGIN MESH=kicks X=0 Y=0 Z=0
#exec
MESH SEQUENCE MESH=kicks SEQ=All STARTFRAME=0 NUMFRAMES=101
#exec MESH SEQUENCE MESH=kicks SEQ=kicks STARTFRAME=0 NUMFRAMES=101
#exec TEXTURE IMPORT NAME=kickstex FILE=Textures\stripes.pcx
#exec
MESHMAP NEW MESHMAP=kicks MESH=kicks
#exec MESHMAP SCALE MESHMAP=kicks X=0.5 Y=0.5 Z=1.0
#exec MESHMAP SETTEXTURE MESHMAP=kicks NUM=1 TEXTURE=kickstex
simulated function PostBeginPlay()
{
LoopAnim('kicks');
Super.PostBeginPlay();
}
defaultproperties
{
DrawType=DT_Mesh
Mesh=VertMesh'kicks.kicks'
}
Now compile the script.
If you don't want to go throught is process in our example's case,
you can download the compiled class here.
(This kicks.zip file is a bit large in size, because it contains the
original uncompiled structure as well including the textures.) You
should have a new file called kicks.u which has to be put into the
System Folder of Unreal. The
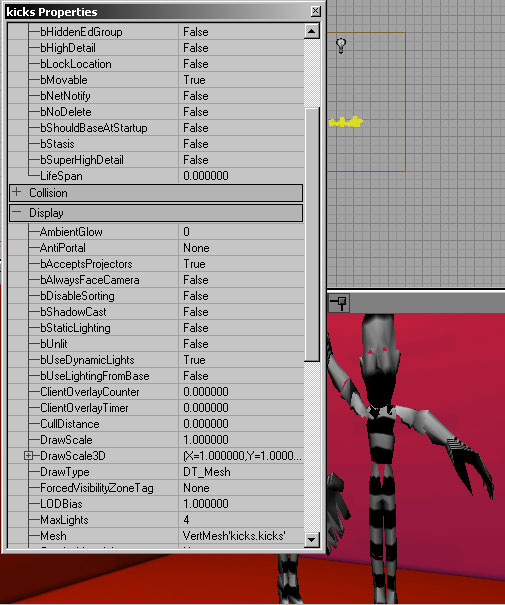
animated Mesh will show up in the UnrealEd Meshes browser, if you
added kicks to your EditPackages and put the file kicks.u into the
System folder of UT2003.
After you opened the Unreal Editor, you will find kicks in the Actor classes as a placeable item. Just right click on the floor of your 3D view window and select "Put Actor kicks here".
Play! See it move!